Blog
Eyelash Extension Tutorial: Ultimate Guide on Lashing In Layers
Are you looking to speed up your lash extension process, steer clear of the dreaded stickies, and offer a variety of top lines in your lash sets? It’s not magic, but it’s pretty close.
In the lash industry, the use of layers is a known technique, yet often overlooked. Typically, when a client arrives, we go through the consultation, perform the pre-treatment, and start on their lashes. Working with their layers seems like too much of a time-consuming process, right? Wrong! Once you discover the benefits of layering, you’ll never want to go back to your old methods. Here are some tricks to get you started!

What Are Lash Layers
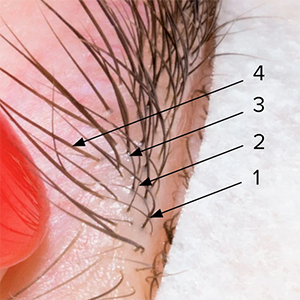
The majority of us have multiple rows of natural lashes (or lash lashing in layers) rather than a straight line. Typically, clients have 3-5 rows of eyelashes, based on their thickness. These rows are categorized into a top layer, a middle layer, and a bottom layer.
The bottom layer refers to the lash row closest to the waterline, when the top layer is closest to the crease of the eyes, and to the tech during the procedure. Identifying and differentiating between these layers can sometimes be challenging, with much time required.
To gain a better understanding of “how many rows of lashes do we have?” we can try gently lifting our eyelids with our two fingers and observing our lashes from the sides. With practice, any of you will become more skilled at clarifying your lash layers on your own.
Benefits Of Doing Extensions in Lash Layers
The layering technique in eyelash extensions offers several advantages to lash techs. Below are the benefits that can be achieved through lashing in layers:

✔️ Faster Lashing Time
Designing a personalized look for many clients can exceed the anticipated time frame, which leads to inconvenience for both you and your client. Fortunately, lash layering extensions can streamline the process, saving you time and ensuring a more comfortable experience for your clients.
✔️ A Topline That Is More Even
By using the layering technique for lash layers, lash artists can apply lengths to the individual layers in various ways, enabling the creation of a flawlessly uniform top line. This will be particularly advantageous for volume sets.
Also, based on the desired aesthetic, one can achieve a more natural, or ethereal, delicately fluttering top line. This highlights the significance of mastering the arts of lashing in layers as one of the fundamental techniques in this field.
✔️ No More Stickies Are Found
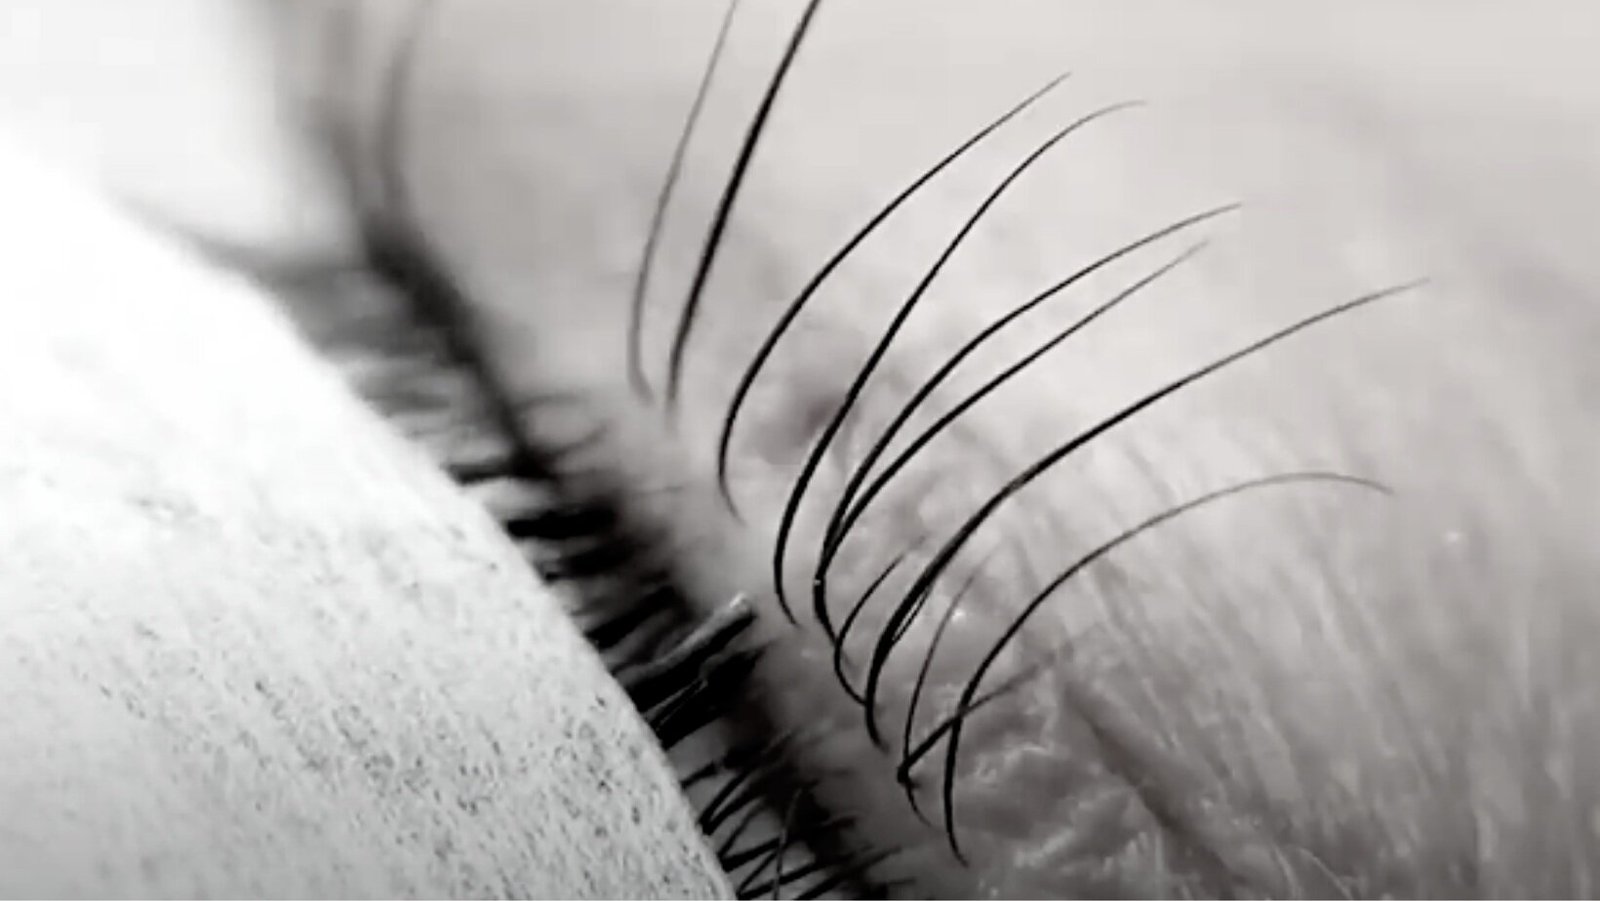
Using tapes to separate your lash layers effectively prevents the occurrence of stickies. This ensures that the lashes are adequately isolated from neighboring eyelashes, minimizing the likelihood of them becoming entangled.
Additionally, this method enhances visibility, making it easier to identify and address delicate baby eyelashes that often adhere to the extensions, potentially causing the most detrimental “sticky” case of the lash layers of your clients.
Ok Great, Now How Do I Work With Lash Layers?
To help you master the art of lashing in layers, we have compiled a step-by-step guide that outlines the process and shares expert tips for achieving exceptional results.
STEP 1: PREPARATION
Before you embark on the lashing process, it is crucial to ensure proper preparation. Here are some key steps to follow:
- Cleanse the natural lashes thoroughly to remove any traces of oil, makeup, or debris.
- Prime the lashes with a suitable lash primer to enhance adhesion and longevity.
- Select the appropriate lash extensions, considering their curl, length, and thickness.
STEP 2: ISOLATION
Precise isolation is the foundation of successful lash extension application. Follow these guidelines to isolate the layers effectively:
- Use a high-quality lash tweezer to separate each layer of lashes.
- Isolate the bottom layer first, ensuring that the lashes from the upper layers are secured and out of the way.
- Gradually move up to isolate each subsequent layer, taking care to isolate only the lashes from the intended layer.
STEP 3: LASHING TECHNIQUE
Now, let’s explore the lashing technique for each layer:
-
Start with the bottom layer: Attach the lash extension to the top of the natural lash on the bottom layer using a precise and gentle hand. This technique ensures a seamless integration between the natural lashes and extensions, providing a unified and flawless appearance.
-
Proceed to the middle layer: Repeat the process of attaching lash extensions to the top of the natural lashes in the middle layer. Take note of any variations in curl, length, or thickness to create a beautifully textured and layered effect.
-
Finally, address the top layer: Apply lash extensions to the top layer, paying attention to achieving a natural gradient effect. Use lashes with a slightly lesser curl to maintain balance and enhance the overall look.
STEP 4: MIXING CURLS AND LENGTHS
To create a harmonious and visually appealing result, consider mixing curls and lengths strategically:
- Opt for a stronger curl on the bottom layer to provide a solid foundation and lift to the lashes.
- Use a slightly lesser curl on the top layer to maintain a natural appearance and avoid an overly dramatic effect.
- Tailor the lengths of the lash extensions based on each layer to achieve a seamless blend and a captivating, multi-dimensional look.

Jot These Down When Working With Lash Layers!
There are certain things to engrave in your mind. Always make sure that the lash extensions follow the same direction as the previous layer. This is crucial to creating natural looks, as if the lashes were growing seamlessly from the lash line, rather than simply adding length.
When working systematically in lash layers, the lash direction seems to be symmetrical, as if they all go in the same direction. This technique holds particular significance for volume and mega volume lashes, where lash layers play a vital role in achieving the desired look.
For striking, intensely dark lash layers, use the same length for all, which gives off a staircase effect that adds texture to the overall look. To get perfectly symmetrical lash sets of uniform length, opt for longer lashes on the bottom layer, and gradually transition to shorter lashes as you move towards the middle and top layers.
To attain the desired effect, experiment with different lengths and curls for wispy and textured lash layers. When styling lashing in layers, try on more curled layering extensions (perhaps a D Curl), on the bottom layer. This will effectively lift the lashes upward for whoever has those naturally straight or downward-pointing lashes.
After all, it is best to inform your clients how to upkeep and treat their lash extensions. Give a free lash extension aftercare kit as a gift and advise them to stay away from water, steam, or any oil-based items for the first several hours after treatments
Top Tip:
To help you refine your lash extension skills and optimize your results, here are some expert insights to consider:
- Practice precise isolation: Take your time to isolate each layer accurately, ensuring that you work with the lashes from one layer at a time.
- Customize length and curl: Tailor the length and curl of lash extensions for each layer to create a stunning gradient and enhance the natural beauty of the eyes.
- Use high-quality products: Invest in top-notch lash extensions, lash adhesives, and primers to ensure long-lasting results and client satisfaction.
- Regular maintenance: Educate your clients about the importance of regular refill appointments to maintain the integrity and longevity of their lash extensions.
